In a Kubernetes cluster, for effective operation, applications need to communicate with each other, connect to various databases, access APIs, communicate with services outside the cluster, etc.
This communication (from internal service discovery to external resource access) is most commonly facilitated through DNS requests.
Understanding how DNS policies work is essential for learning how these DNS-based communications are resolved within Kubernetes (K8S).
Table of Contents
dnsPolicy
dnsPolicy configures how DNS query resolution works at the pod level. It determines how a pod locates and communicates with services inside and outside the cluster.
With dnsPolicy, you’re setting up rules for resolving the pod’s DNS requests – whether to use the cluster’s internal DNS service, defer to the node’s DNS settings, or use a custom configuration.
There are four possible values for this policy. Let’s see how each work and differ from each other.
Here’s a quick summary for you.
Cluster Setup
Before practically implementing dnsPolicy configuration, let’s understand the cluster setup.
I am using Kind to run K8S locally. Kind uses Docker containers to set up the K8S cluster.
For this setup, I have:
- K8S DNS IP –
10.96.0.10
You can find your K8S DNS IP using the below command. Essentially, it’s the IP for kube-dns service.
> kubectl -n kube-system get svc kube-dns
2. K8S Host’s DNS IP — 172.20.0.1
Since I am using Kind, to get the host DNS for my K8S cluster, I need to ssh into kind-control-plane container and run the below command.
> docker exec -it kind-control-plane bash
> root@kind-control-plane:/# cat /etc/resolv.conf
3. We will use the netshoot and nginx containers for the demo.
netshoot: a Docker + Kubernetes network trouble-shooting swiss-army container
4. To follow hands-on exercises, clone this git repo and change to dnsPolicy directory.
ClusterFirst
ClusterFirst is the default and most commonly used DNS policy for pods. It allows both internal cluster communication as well as access to external networks.
When a pod makes a DNS query, the request is forwarded to external nameservers if the domain doesn’t match the cluster’s domain suffix.
This configuration allows communication with resources outside the cluster, such as public APIs or external databases, while efficiently handling internal communication.
Here’s the plan to test ClusterFirst :
- Start the sample web application using nginx and create a service to access the application.
- Launch the
netshootpod without any explicitdnsPolicyspec.
> kubectl apply -f nginx-deployment.yml
> kubectl apply -f netshoot-deployment.yml- Describe the
netshootpod and check the default value fordnsPolicy. We should getdnsPolicy: ClusterFirst
> POD=$(kubectl get pod -l app=netshoot -o jsonpath="{.items[0].metadata.name}")
> kubectl get pod $POD -o yaml | grep dnsPolicy- Exec into the
netshootpod.
> kubectl exec -it $POD -c netshoot -- /bin/zsh- Check the pod’s DNS configuration by reading
/etc/resolv.conffile.
> cat /etc/resolv.conf

search default.svc.cluster.local svc.cluster.local cluster.local
nameserver 10.96.0.10
options ndots:5- Use
curlto access the sample web app. We get the default nginx webpage.
> curl http://nginx-service

<!DOCTYPE html>
<html>
<head>
<title>Welcome to nginx!</title>
***- Check how the web app’s service name resolves using
nslookup.
> nslookup nginx-service

Server: 10.96.0.10
Address: 10.96.0.10#53

Name: nginx-service.default.svc.cluster.local
Address: 10.96.159.191- Check how the external resource resolves using
nslookup. The DNS address is10.96.0.10#53, the same one as above used in the internal query.
> nslookup google.com

Server: 10.96.0.10
Address: 10.96.0.10#53

Non-authoritative answer:
Name: google.com
Address: 172.217.21.174
Name: google.com
Address: 2a00:1450:400f:80c::200e
Pheww! That’s a lot for a default value. So, take a deep breath.

And let’s step back and see where we are now.
- We started two pods with no explicit
dnsPolicyspec. - We tried to reach the web app (using DNS) from
netshootpod. That worked. - We reached out to Google (using DNS). That worked as well.
- So, both of our queries, internal and external, were resolved correctly.
That’s how dnsPolicy: ClusterFirst works.
Default
When dnsPolicy is set to Default , all the DNS queries made by the pod are resolved by the underlying host node.
As we saw in cluster setup, for me, the underlying host node is
kind-control-planecontainer and its DNS IP is172.20.0.1
Here’s the plan to test how Default works:
- Add
dnsPolicy: Defaultto thenetshootpod spec and re-apply the deployment.
    spec:
      dnsPolicy: Default
      containers:
        - name: netshoot
          image: nicolaka/netshoot:v0.11
> kubectl apply -f netshoot-deployment.yml
deployment.apps/netshoot configured- Exec into the pod.
> POD=$(kubectl get pod -l app=netshoot -o jsonpath="{.items[0].metadata.name}")
> kubectl exec -it $POD -c netshoot -- /bin/zsh- Try to access the sample nginx app using
curl.
> curl http://nginx-service
curl: (6) Could not resolve host: nginx-serviceHmm. You should be able to guess what happened here.
- Since the pod now uses the underlying host’s DNS settings, it does not know anything about our K8S nginx service,
nginx-service. Remember,nginx-serviceis only accessible within the cluster. - Let’s verify
/etc/resolv.confcontents.
> cat /etc/resolv.conf
nameserver 172.20.0.1
nameserver 2001:4860:4860::8888
nameserver 2001:4860:4860::8844
options edns0 trust-ad ndots:0Note the IPv4 nameserver now matches with the underlying host.
- Let’s access Google.
> curl https://www.google.com/This is working as the underlying host’s DNS can resolve the query.
That’s how dnsPolicy: Default works.
ClusterFirstWithHostNet
In a few use cases, pods must use the underlying host’s network as a primary interface rather than default K8S networking.
These use cases can be:
- To implement node-level monitoring services that must be configured on the host network to collect data from the entire node.
- Tools that need to monitor or debug the cluster’s network traffic often run
hostNetwork: trueto get a more comprehensive network view. - Applications that require the lowest network latency can use the host network to bypass the additional network layers imposed by K8S.
In such use cases, using ClusterFirstWithHostNet ensures these applications can still resolve cluster-internal services while using the host network.
Let’s test this.
- First, we need to ensure the
netshootuses the underlying host network, and then we can configure it to useClusterFirstWithHostNet.
spec:
dnsPolicy: ClusterFirstWithHostNet
hostNetwork: true
containers:
- name: netshoot
image: nicolaka/netshoot:v0.11
command: ["/bin/bash"]
args: ["-c", "while true; do ping localhost; sleep 60;done"]
hostNetwork: trueconfigures the pod to use the host network. By default it’s set tofalse.
- Exec into the pod.
> POD=$(kubectl get pod -l app=netshoot -o jsonpath="{.items[0].metadata.name}")
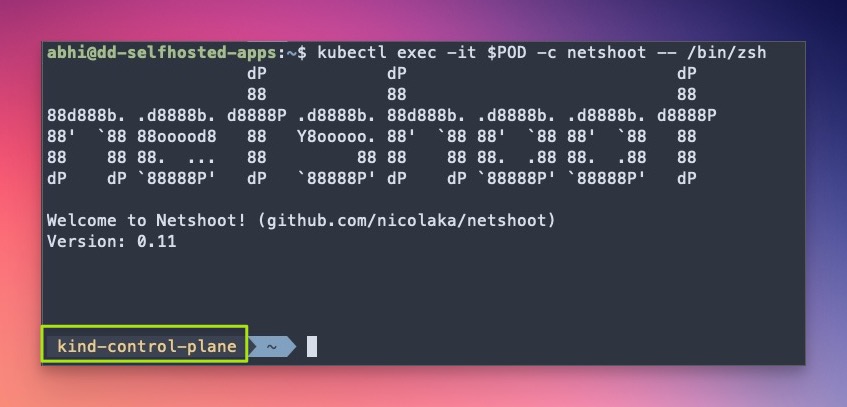
> kubectl exec -it $POD -c netshoot -- /bin/zsh- The first difference you can spot is the pod’s hostname. In my case, it’s
kind-control-planematching with myKindcluster container.
- Both cluster-internal and external services should be accessible.
> curl https://www.google.com/
> curl http://nginx-serviceThat’s how dnsPolicy: ClusterFirstWithHostNet works.
P.S. Comment out line
dnsPolicy: ClusterFirstWithHostNetfromnetshoot-deployment.yml, reapply the deployment, and test bothcurlcommand again from thenetshootpod.
None
When you need to skip the K8S networking stuff on your pods and instead want to use a custom DNS configuration, dnsPolicy: None comes in handy.
We can set custom DNS settings using dnsConfig field in the pod spec.
- Modify
netshootdeployment as per the below config.
spec:
dnsPolicy: None
dnsConfig:
nameservers:
- 1.1.1.1
searches:
- ns1.svc.cluster-domain.example
options:
- name: ndots
value: "2"
containers:
- name: netshoot
image: nicolaka/netshoot:v0.11dnsConfiglooks familiar to/etc/resolv.conffile we saw earlier.- Apply the updated spec and exec into the pod.
> kubectl apply -f netshoot-deployment.yml

deployment.apps/netshoot configured
> POD=$(kubectl get pod -l app=netshoot -o jsonpath="{.items[0].metadata.name}")
> kubectl exec -it $POD -c netshoot -- /bin/zsh- Again
curlcomes in handy here. Google is reachable.nginx-serviceisn’t.
> curl https://www.google.com/
> curl http://nginx-service- Why
nginx-servicefailed? Simply put, the pod has no info about the K8S internal network. - To make the pod aware of the internal network, update the spec as per below, re-apply, exec into the new pod, and try both
curlagain.
Update my K8S DNS IP
10.96.0.10with yourkube-dnsIP.
> kubectl -n kube-system get svc kube-dns
    spec:
      dnsPolicy: None
      dnsConfig:
        nameservers:
          - 1.1.1.1
          - 10.96.0.10
        searches:
          - ns1.svc.cluster-domain.example
          - default.svc.cluster.local
          - svc.cluster.local
          - cluster.local
        options:
          - name: ndots
            value: "2"
      containers:
        - name: netshoot
          image: nicolaka/netshoot:v0.11
That’s how dnsPolicy: None works.
Conclusion
We have explored the dnsPolicy and covered all four values in hands-on exercises.
This should give you a fair idea of how pods can reach out to other pods, external services, etc.
Remember, Networking in Kubernetes is a whole game in itself. We have just scratched the surface here. You can refer to the sources below to dive in depth.
🙏 Thanks for your time and attention all the way through!
Let me know your thoughts/ questions in the comments below.
If this guide sparked a new idea,
a question, or desire to collaborate,
I’d love to hear from you:
🔗 Upwork
Till we meet again, keep making waves.🌊 🚀
Leave a Reply